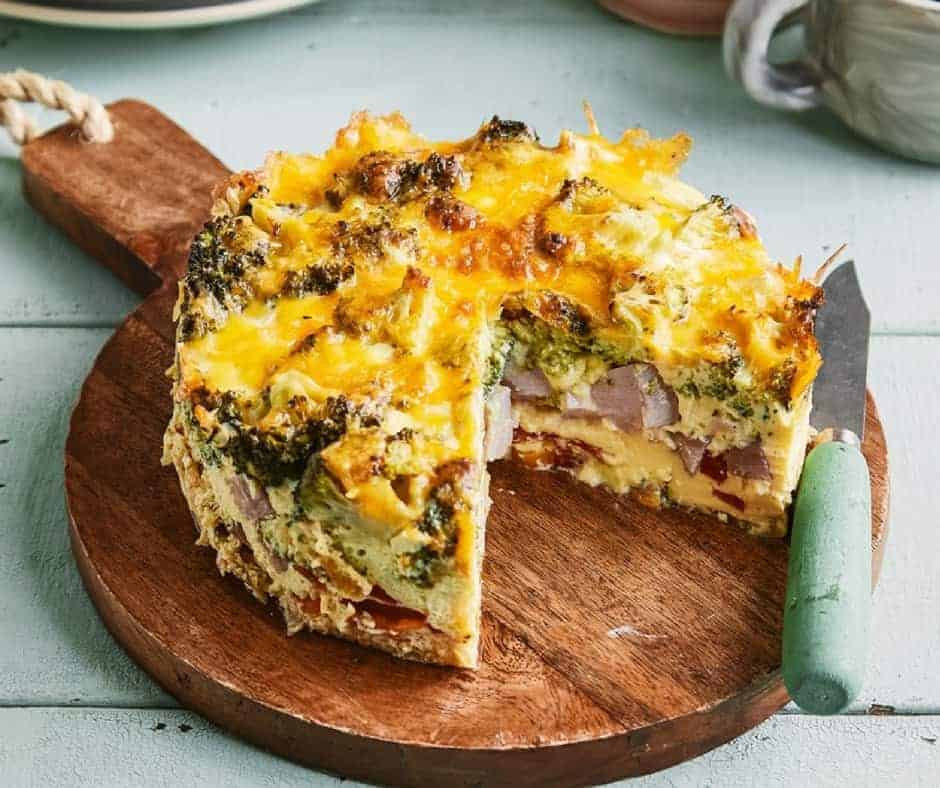
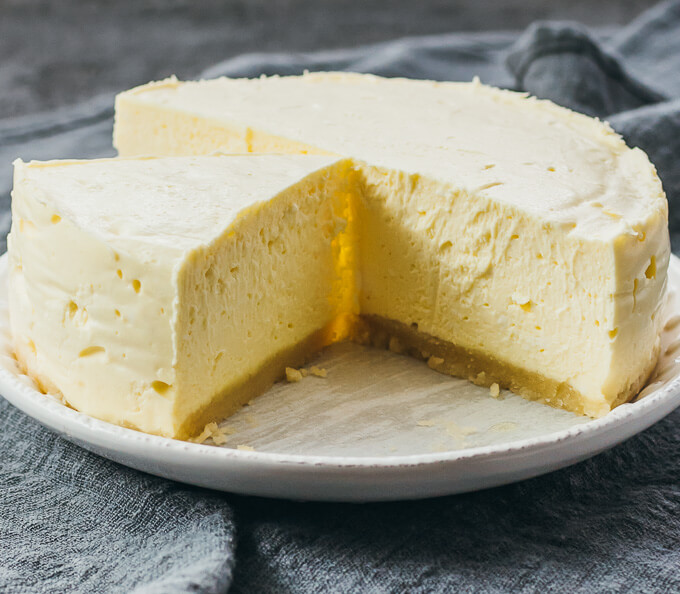
This time of year, it seems like it’s all about the food! Thanksgiving is right around the corner, and it won’t be long until Santa comes to town. We want to help make your life a little easier when it comes to navigating the kitchen this holiday season. We’re giving you some of our favorite diabetic-friendly recipes that you can make in the Instant Pot!
BROCCOLI FRITTATA WITH HAM AND PEPPERS
From twosleevers.com

Prep Time: 10 mins
Cook Time: 30 mins
Total Time: 40 mins
Dietary Consideration: Gluten-Free, Grain-Free, High Fat, Keto, Low Carb, Low Sugar, Paleo, Soy-Free
INGREDIENTS:
- 8 ounces ham, cubed
- 1 cup sweet peppers, sliced
- 2 cups frozen broccoli
- 4 eggs
- 1 cup half and half
- 1 cup shredded cheddar cheese
- 1 tsp salt
- 2 tsp ground pepper
INSTRUCTIONS:
- Grease a 6×3 pan extremely well. I mean, EXTREMELY well. You do not want to be scraping out egg because you forgot to grease a corner. I used a silicone brush to get oil or butter into every crevice of my pan.
- Arrange the sliced sweet peppers in the bottom of the pan
- Place the cubed ham on top of it
- Cover with frozen broccoli. Before you ask me, yes, this will work with fresh broccoli as well, I used frozen because that’s what I had.
- In a mixing bowl, whisk together the eggs, half and half, salt and pepper
- Stir in shredded cheese
- Pour the egg mixture on top of your vegetables and cover with foil or a silicone lid
- In the inner liner of your instant pot or pressure cooker, place 2 cups of water
- Place a steamer rack on top of this
- Place the covered pan on the steamer rack
- Cook on high pressure for 20 minutes. Allow it to release pressure naturally for 10 minutes, then release all remaining pressure.
- Let it sit for 5-10 minutes. Using a knife, gently loosen the sides of your wondrous creation. Place a plate on top of the pan, and thump out the frittata onto the plate. If you want the ham and pepper side up, you’re done. If you want the cheese side up, flip it on a plate once more.
- You can broil for 3-4 minutes to get the cheese to melt or serve as is.
RECIPE NOTES:
Substitutions that will likely work:
- Fresh broccoli for frozen
- Other veggies instead of broccoli and pepper, but do not use mushrooms as they will release too much water
- Dairy-free milks
- Individual servings in jars or ramekins—cook 4-5 minutes
- Yes, this reheats well. No, I would not freeze it.
- If you don’t use ham, use some other cooked meat. Raw meats will release too much water. Chicken sausage, roast beef chunks, smoked sausage, etc.
NUTRITION FACTS PER SERVING:
422kcal | Fat: 30g | Saturated Fat: 15g | Carbohydrates: 9g | Fiber: 2g | Sugar: 2g | Protein: 28g
INSTANT POT CRACK CHICKEN
From diethood.com

In a nutshell, everything is going into the Instant Pot for 20-ish minutes.
- Start with heating up your Instant Pot and add diced bacon; cook for a couple minutes, or to a desired crispness. Remove bacon and set aside.
- Heat some oil in the Instant Pot and brown your chicken breasts on all sides, for about 2 minutes per side. You don’t have to brown the chicken – it’s up to you – but I think it’s better if you do.
- Add chicken broth to the Instant Pot, plus a block of cream cheese, and your ranch seasoning mix that includes; dried dill, dried chives, garlic powder, onion powder, salt, and pepper.
- Cook on HIGH PRESSURE for 12 minutes, then do a quick release.
- Remove chicken from the Instant Pot and shred it.
- Stir the chicken back into the Instant Pot; place the lid back on the Instant Pot (powered off) and let stand for 5 minutes to thicken the sauce.
HOW TO MAKE CRACK CHICKEN IN YOUR CROCK POT OR SLOW COOKER:
Add the chicken, cream cheese, AND ranch seasoning to a slow cooker; cook on low for 5 to 6 hours or on high for 3 to 4 hours. OR, until chicken shreds easily. Once shredded, toss it back in the slow cooker and stir. Add in crumbled bacon and serve.
COOK’S NOTES: TIPS FOR PERFECT CHICKEN
- IF the sauce is too thick, stir in a bit of water.
- IF the sauce is too thin, make a slurry with cornstarch and a little cold water; mix until smooth. Stir the mixture into the hot liquid until it’s blended.
- You can use a Ranch Seasoning packet if you want, but I suggest making it from scratch. The store-bought stuff has too much sodium.
WHAT DO YOU EAT CRACK CHICKEN WITH?
Crack chicken is basically a chicken filling meant to be used in sandwiches, but we can always go a step further and add crack chicken to:
- Salads
- Lettuce Wraps
- Low Carb Flour Tortillas
- You can also serve it as a dip for veggies.
Obviously, Instant Pot Crack Chicken is an easy dinner recipe, the kind of dish that requires very minimal work on your part. All you have to do is get out your Instant Pot, toss in the ingredients, and turn up the heat. Then, EAT!
CAN YOU FREEZE CRACK CHICKEN?
Yes, you absolutely can.
- Let it cool down completely; then transfer it to a large freezer bag or airtight container. Store in the freezer for up to 3 months.
- When ready to serve, remove from freezer the night before and let thaw in the fridge overnight.
- Reheat and serve.
LOW CARB INSTANT POT CHEESECAKE (KETO RECIPE)
From savorytooth.com
A quick and easy recipe for keto/low carb cheesecake made in the Instant Pot pressure cooker, with a gluten-free almond flour crust.

Prep Time: 20 minutes
Cook Time: 30 minutes
Servings: 6 servings
Calories: 460 kcal
INGREDIENTS
Crust:
- 3 ounces (3/4 cups) of blanched almond flour
- 1.5 ounces (3 TBS) salted butter, melted
- 0.5 ounces (1 heaping TBS) powdered erythritol sweetener
Filling:
- 16 ounces of cream cheese, softened to room temperature
- 4 ounces (2/3 cup) powdered erythritol sweetener
- 2 large eggs at room temperature
- 2 ounces (1/4 cup) heavy whipping cream at room temperature
- 1 TBS lemon juice
- 1 tsp vanilla extract
INSTRUCTIONS:
Preparation:
- Remove cold ingredients (cream cheese, eggs, heavy cream) from the refrigerator and allow them to warm to room temperature. Start this 30 minutes before proceeding with the rest of the recipe.
- Prepare a steam rack or the trivet that came with your pressure cooker, ideally with lifting handles
- Prepare an aluminum 6-inch round cheesecake pan with removable bottom or springform pan. Line the bottom and sides of the pan with separate pieces of parchment paper.
Make the crust:
- Combine melted butter and erythritol in a mixing bowl, and stir together. Add almond flour, stirring until the butter is absorbed and forms a dough.
- Transfer the dough to the cheesecake pan. Use a spoon or measuring cup to firmly press down to form a flat and smooth crust covering the entire bottom of the pan.
- Transfer the fan to the freezer to chill the crust for 20 minutes while you work on the filling.
Make the filling:
- Add cream cheese and erythritol to a large bowl. Use a hand mixer to beat on low speed until well-mixed, about 1 minute.
- Add heavy cream, lemon juice, and vanilla extract. Beat on low speed until smooth, about 30 seconds.
- Add eggs one at a time, beating on low speed until just combined, about 30 seconds each. Don’t overmix the eggs.
- Remove the pan with chilled crust from the freezer. Pour the batter over the crust, careful not to leave trapped air gaps. Flatten the surface using a spatula.
Cook and cool:
- Add 1 cup of water to the bottom of the pressure cooker. Place the trivet over the water, with its handles resting on the sides of the pot. Place the cheesecake pan on top of the trivet
- Secure and seal the lid. Cook for 30 minutes at high pressure, followed by a 15 minute natural release. Manually release any remaining pressure by gradually turning the release knob to its venting position.
- Carefully lift the lid to avoid dripping condensation on the cheesecake. The top of the cheesecake should be jiggly but not liquid. If needed, use a paper towel to carefully dab at the cheesecake to absorb any condensation on its surface. Turn off the pressure cooker.
- Let the cheesecake cool uncovered in the pressure cooker. After about an hour, lift it from the pot using the trivet’s handles to cool on the countertop.
- After it has cooled, loosely drape a paper towel over the cheesecake pan and refrigerate for at least 24 hours. Do not seal tightly because the cheesecake needs to dehydrate.
- Carefully remove the chilled cheesecake from the pan. Peel off the parchment paper. Slice and serve.
NUTRITION INFO PER SERVING:
Calories: 460
Total Fat: 45g
Saturated Fat: 23g
Trans Fat: 0g
Cholesterol: 168mg
Sodium: 370mg
Potassium: 90mg
Total Carb: 6g
Dietary Fiber: 1.5g
Sugars: 1g
Protein: 11g
